I’m really enjoying these wearable muslins that turn out so well! The Elevate Crop Top was my choice of pattern to make a sports/lounge bra from the raspberry athletic knit. This project was included in my May 2020 Projects Preview on YouTube, though I was planning to make it with knickers and not the skort that I ended up making yesterday. I had originally planned to use the Barrett Bralette pattern but after two makes of that, I decided it wasn’t really want I wanted to make again. I wanted something with more coverage, a little more sporty.
The Elevate Crop Top is something I found through a really round-about journey:
- I looked at the new Jalie Patterns “Coco” Sports Bra and thought it looked great, but would have been tricky to do a FBA and I wanted something a little more long-line.
- Some people in the Jalie Patterns Facebook Group “Sewing with Jalie” mentioned the Greenstyle Patterns “Power Bra”, so I looked at that and read a few reviews.
- I started browsing the Greenstyle Patterns and found the Elevate Crop Top (as well as three others must stop buying patterns dangit).
So I purchased and downloaded the Elevate Crop Top and Overlay pattern, though I do not intend to make the Overlay. I don’t think it’s my style, but never say never.
I cut out the pattern from my raspberry pink athletic knit, but then I had a fit of indecision about how I wanted to actually construct it… colour blocking? Additional elastic for support? Lining? So it was obviously a sign that I needed to make a wearable muslin.
This is when I actually got distracted and decided to also print, tape, cut and sew the Loulouxe skort and so that got me busy last night, whipping up a wearable muslin out of swimwear and “matte look actionwear” (Fabricland’s spandex option) that has been in my stash since dirt was young.
This morning, while recovering from the hangover inflicted by last night’s sangria, I figured out that I had *just* enough scraps left over of the print swimwear (with a bit of surreptitious piecing in the front straps) to cut out a muslin of the Elevate top. I had to use the very last dregs of both fabrics from the skort muslin but it was delightful to see a matched set coming together!
The next step was figuring out my construction details… the instructions for the Elevate are fairly decent, but do not show how using a serger differs from a sewing machine for this make. It also doesn’t provide any guidance on how to make this as a lined top, and unless you are really small-chested, any knit top like this is really best done with a lining.
There is a blog post on Greenstyle’s website providing a pattern hack to make the Elevate Top into a swim top, but it gets rid of the very cool crossover band which was a deciding feature for me, so I knew I wanted to find a way to make the top more supportive without going full-out sports bra with it. So here’s what I did!
Lining – I lined the bra with bamboo lycra knit that happened to be kicking around. I bought 0.4m planning to make panties out of it, but it’s too soft/loose/drapey for my panty preferences. I made a headband the other day (first time in 30 years I’ve made a hair accessory) but otherwise this was just kicking around in my new “useful scraps” drawer. I cut out the front and back and then I spray-glued the lining to the self fabric with quilt basting spray and a little glue stick here and there.
With the front and back treated as one, I was able to do the gathering at the side seams for the “full bust version” of this top. I appreciate the designer including this option in the pattern, because it provides the length necessary in the front for a larger bust without fussing about with cup seams and FBAs. The only thing I quibble with is their instructions: you’re supposed to cut elastic to match the length of the side seam on the back piece, then use it to gather the front side seam to the same length. This would MAYBE work okay if using a braided elastic, but the instructions also suggest clear elastic. Working with clear elastic is hell on a good day, but if you cut it exactly the length you want it to be, there’s nothing to hold on to for doing the actual gathering. SO… I cut it 2 inches longer and marked the length I wanted it to be. Then I could hold on to the starting and ending extra bits while running it through the machine and stretching so the marks would align with the top and bottom of the pattern piece. This gathered the whole piece to the right amount with a minimum of fussing and cursing.

all the pins necessary to make this work!
Neckline and Armhole Bindings – I chose to do bindings instead of bands because I didn’t want this to look like a t-shirt. I only had barely enough fabric to cut the bindings out of the print swimwear. I would have loved to use the solid, but it was all in scraps by that point. Doing a binding with swimwear knit requires a LOT more pinning and very careful sewing than I was fully expecting. After an initial failure, where I couldn’t keep the binding aligned properly during cover-stitching it, I used way way more pins to keep it in place, and ended up mostly succeeding. My cover-stitching accuracy could still use a whole lot more improvement! Because the binding has to be stretched quite a bit around many curves, I serged it on first and then turned it, pinned it, and cover-stitched it in place. A simple zig-zag stitch on that binding would also have worked, but I have this cover-stitch machine and I need to get practice with it!
Band – instead of swapping out the band for an elastic inserted in a sewn-on channel, as the swim bra hack recommends, I decided to see what Power Net would do for me, added on the inside of the shaped band. Power Net, aka girdle mesh, is about 30% stretch in one direction and maybe 15% in the other. I had some of it in black in my bra making supplies. It wasn’t wide enough so instead of cutting it on the fold, I cut two pieces and added a seam allowance for a centre back seam. I cut it so the 30% stretch was going around my body, because 15% didn’t seem like it would be enough to get over my head without dislocating a joint or two.
After stitching the centre seam and topstitching the seam allowances to keep them from poking up, I used the spray adhesive to temporarily attach the Power Net to the band fabric.

Power Net cut & centre back seam stitched 
Seam allowances tacked down with zigzag 
Power Net spray-glued to the band fabric and the band constructed
With the Power Net folded inside the band, that’s four pretty thick layers at the raw edges. I zigzag-basted the raw edges together to keep them manageable. When the two sides are overlapped at the front, it’s eight layers and very tough. I zigzagged those together as well. I may actually only use one layer of Power Net next time… we’ll see how well this wears over the next 24 hours.
Attaching the Band – this is where I made my one rookie error on this – or was it a stroke of genius? You decide. The instructions don’t specify that you should put the right or wrong side of the band against the right or wrong side of the lower edge of the top. I didn’t pay attention, and ended up sewing the wrong sides together. I used my serger, and it’s one hell of a bulky seam. Plus I sewed it with grey serger thread so it’s not exactly elegant looking. This is where I began to curse my rookie error, but then I shrugged and decided “meh, it’s a muslin” and pressed on. The seam is too thick to get into my cover-stitch machine to have it anchored down and out of the way. BUT! BUT! Here’s the stroke of genius part! On the inside of the top, because the seam is not there, it’s very smooth and lovely against my skin! So, the rookie error turned out to be a DESIGN FEATURE! I think I might actually repeat this when I make the garment in the “real” fabric. But I’ll change my serger thread.
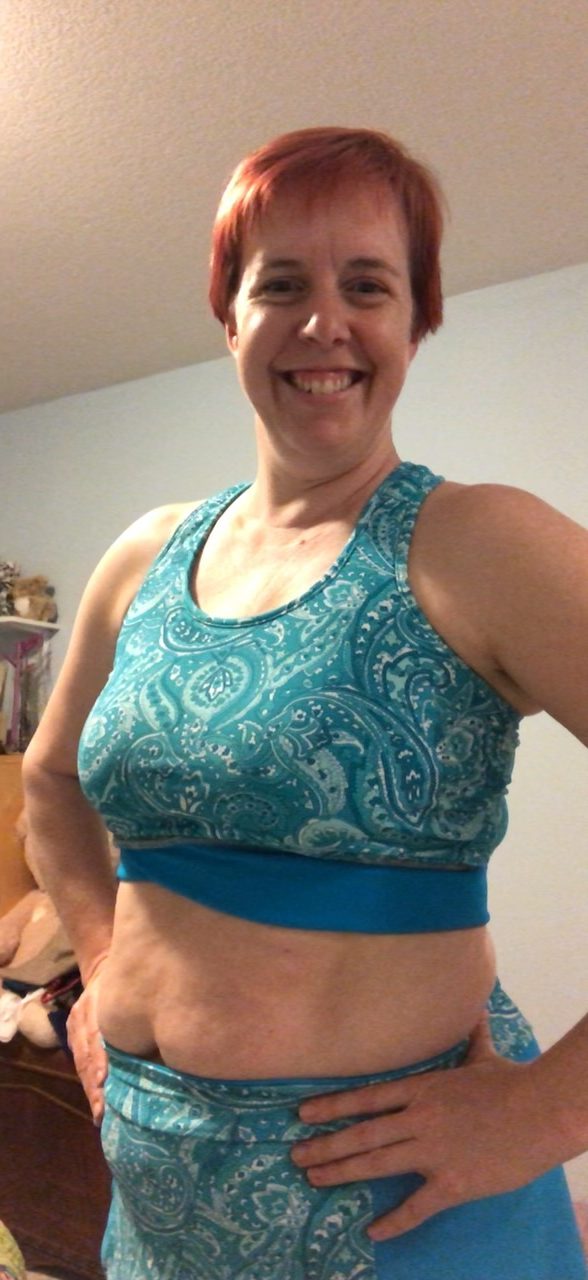
The Finished Garment… so here I am, trying my best to model all sporty-like while my manfriend (wink wink) takes photos of me VIA Facetime screen capture. He’s actually a photographer and tried to help me pose well, which is awfully nice of him.

Front view 
Back view! I love a racer back! And yes, I have a big teddy bear. 
Closeup of the band overlap at centre front and that bigass seam. Glad that’s not on the inside!