It’s been a long time since I made fitted pants for myself. I have been okay doing wide-leg pants, but I have also been on a quest for a properly-fitting jeans/shorts/fitted pants pattern. Last year I drafted a muslin for shorts that I was going to make out of pink sateen, but after fifty bajillion fittings and redraftings, I threw them in the bin. So it was with a fair bit of trepidation that I took on the challenge this week.
I have been amassing fitted pants patterns for a few months, hoping one of them would inspire me, and finally I just took the plunge with Burda 6432. I knew right from the start that I would need to make some pattern adjustments, so I began with the following:
- Lengthen front and back crotch curve – in two directions!
- Full tummy adjustment
- Removed some of the added space in the front crotch, because the full tummy adjustment does the same thing
- Added to the thigh circumference (I have fairly muscular front thighs)
I’ve captured most of those pattern photos here for posterity (click on thumbnail for larger image):
As I started putting the pants together, I realized a few things: first, I wanted to replace the dinky little front pockets with a pocket that would go across the centre front and anchor into the zipper fly. I like this because it acts as a tummy tamer and the pockets end up being so much more useful! So, I redrafted the pocket pieces. Instead of the hip yoke being cut from self fabric (my stripey stuff), I created a small hip yoke out of the stripes and an accompanying pocket bag to cut out of my lining, which is quilting cotton in a really fun print using the same colours as my stretch denim.
Burda 6432 uses an in-seam pocket as the back butt pocket. While I appreciate the attempt at a more tailored look, this design has a serious flaw. I uncovered this by reading this review of the pattern, and then proved it on my own project. The pocket placement across the rounded part of the tush makes it highly probable that the pocket will gape open when worn by anyone but the flattest of flat-butt people. As I am a proud denizen of junk-in-the-trunk, this problem appeared on me. Also, I just didn’t like the way it looked. But I persisted, for a while.
Once I had the legs put together, I tried on the pants and discovered the back rise was not going to be AT ALL high enough. I hadn’t added enough to the pattern. The only way to fix this was to redraft the hip yoke, which you can see in the gallery above. I added a good 1 1/4″ to the hip yoke and re-cut it, then drafted up some patch pockets by tracing off my favourite pair of jeans. Since I had to remove the hip yoke from the seam where the offending pockets were located, I had an opportunity to hack them out and replace them with patch pockets. It took some careful observation to realize that rear patch pockets are NOT placed straight on the grain on Ready-to-Wear Jeans, so I mimicked the placement and I am happy with how it’s turned out.
The rest of the project went fairly smoothly as far as construction goes. The instructions for the zip fly are some of the clearest I’ve ever read. I had taken care to be sure the centre front of these pants would be cut on the straight of grain, because with the stripes there was really no way to cover up any deviancies there. They HAD to be straight or it was going to seriously draw attention to my tummy. No bueno.
I used heavy non-woven fusible interfacing for the waistbands. As noted in that other review I linked to above, the waistband of this pattern is quite thin, so I sewed it with a 3/8″ seam allowance along the top instead of a 5/8″ allowance. That left me space to put in a nice jeans-style button (though I don’t have the cool hammered-on jeans button; I just used something random from my button stash). I should have reinforced the place where I was putting the buttonhole MUCH more than I did – the stitching did a real number on this stretch denim, and it looks pretty low-budget.
Once I had the waistband on, I could check the fit in other places. The extra room I added to the outer thigh was superfluous, so I went back in and re-sewed the side seams. I had accidentally pressed one of the inside seams in the wrong direction and then top-stitched it like that, so I had to pull that out and re-do it (which involved nearly deconstructing the whole outseam of that pant leg, argh).
When I saw the pants on, I realized I’d added too much in the hip yoke and now there was an unattractive bulge above my tailbone. I detached the back waistband and trimmed the hip yoke, then reattached the waistband. I decided the waist of the pants wasn’t actually snug enough and there wasn’t enough shaping at the waist. Fixing this involved undoing the waistband at the centre seam AGAIN, and taking that back centre in about 1″, tapering through the yoke.
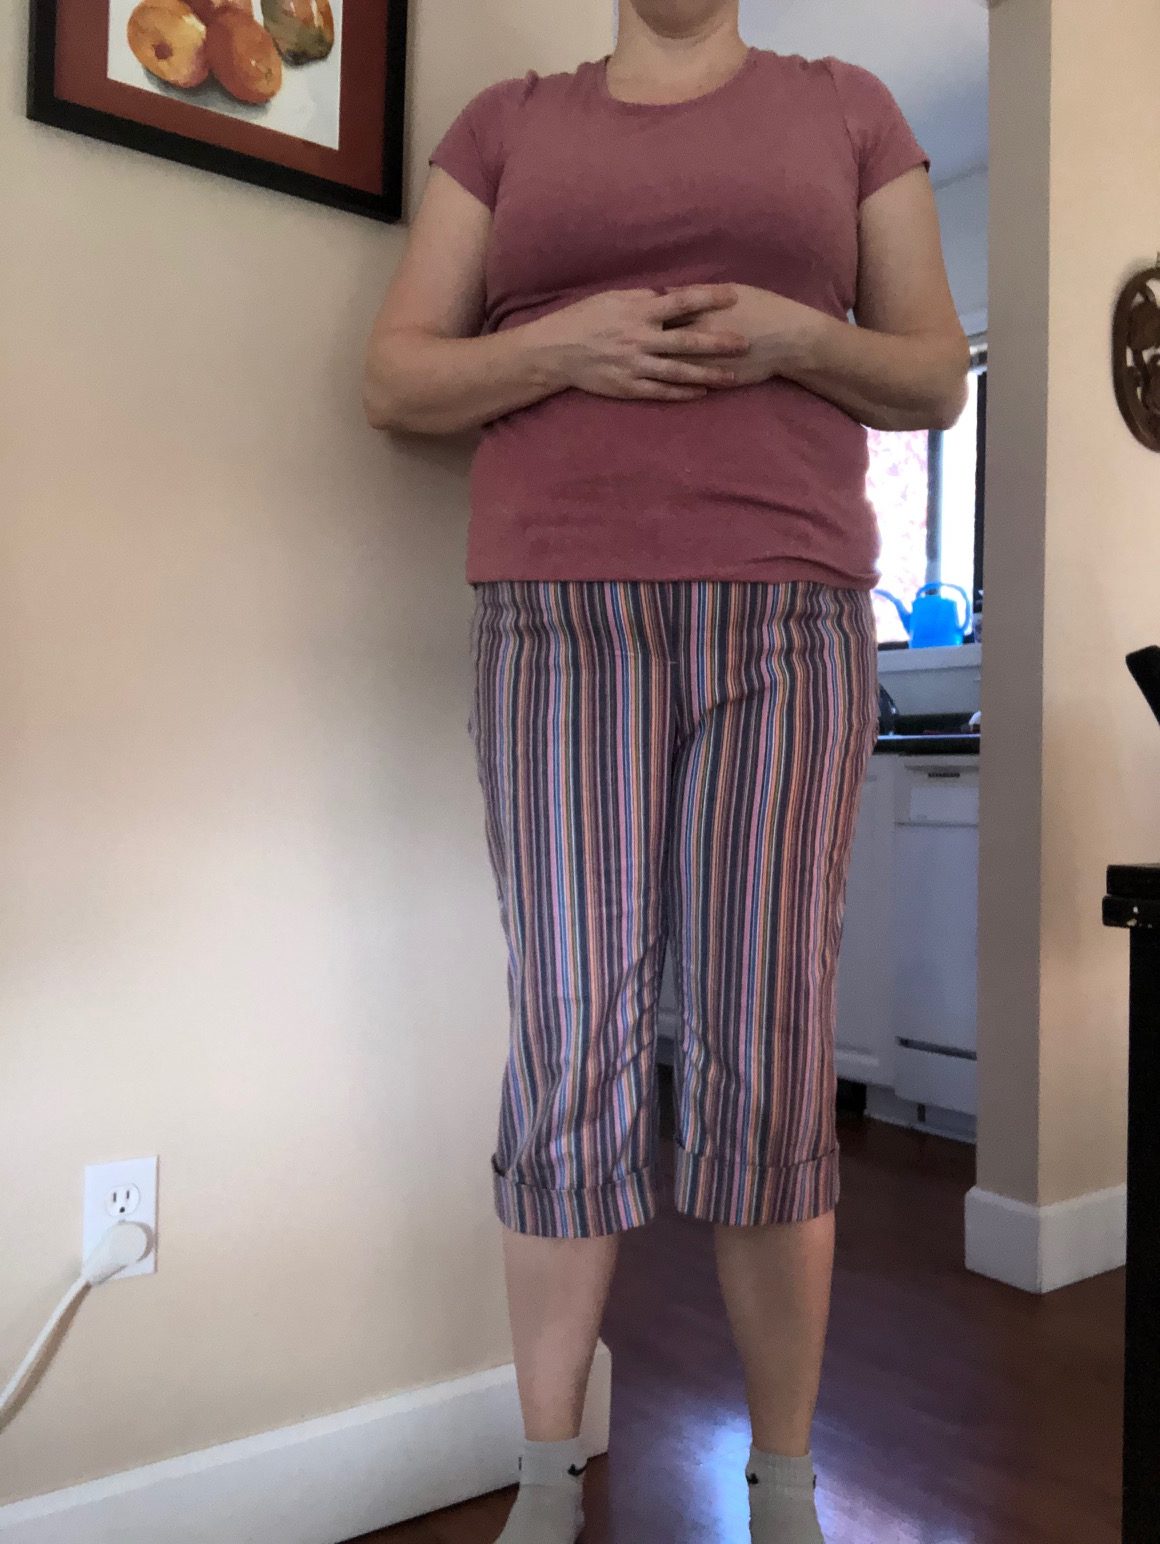
I decided (with Julie’s help) to hem the pants with a wide cuff just below the knee, instead of leaving them mid-calf length. The reason for this is my legs have a bizarre feature – my tibia exit my knees at a wider angle than most people’s. My legs go straight down to the knee and then my calves bow outwards – it looks like I have knock knees. So the pant legs go straight down but my legs don’t come out the middle! It’s bizarre, take my word for it. Hemming the pants just below the knee sort of camouflages this.
I figured I was pretty done that this point… but no! I wore the pants for a few hours and the fabric had a chance to relax, making me realize the waistband was still quite a bit too large. So I went back at the side seams this time, carving out 1.5″ off each side. Yeah, that’s a LOT! Stretch denim is amazingly giving after it warms up! This last set of changes has really brought the pants up to what I’d consider a nearly perfect fit. I think that the crotch depth is a bit on the long side (maybe I can bring it up 1/2″?) but I’d rather have it that way than too short. The front is nearly smile-free. The back has some pulling lines and I’ll try to troubleshoot those.
I plan to make this pattern again using a brown stretch linen that’s in my stash. I’m happy to have learned many things about pants, and to have a pattern that I believe in!