First of all, let it be known that I am INSANE, folks.
I decided at 8pm last night that I would put together an 1920s-inspired costume to wear for attending Downton Abbey: The Movie on Friday night. I ran out and bought 4m of black bridal satin and 1m of black stretch lace, as well as 2 x 1.8m strings of rhinestones (they were on sale, what can I say?). Then I came home, put my kid to bed, and started thinking.
I got home from work at 4:45pm and I have until 7pm tomorrow to design, pattern, cut, sew and fix my screwups. I am not experienced with historical/vintage dressmaking. Fortunately tomorrow is my flex day from work, though I do have a couple of obligations.

Follow along for costuming insanity!!
10pm Thursday Night
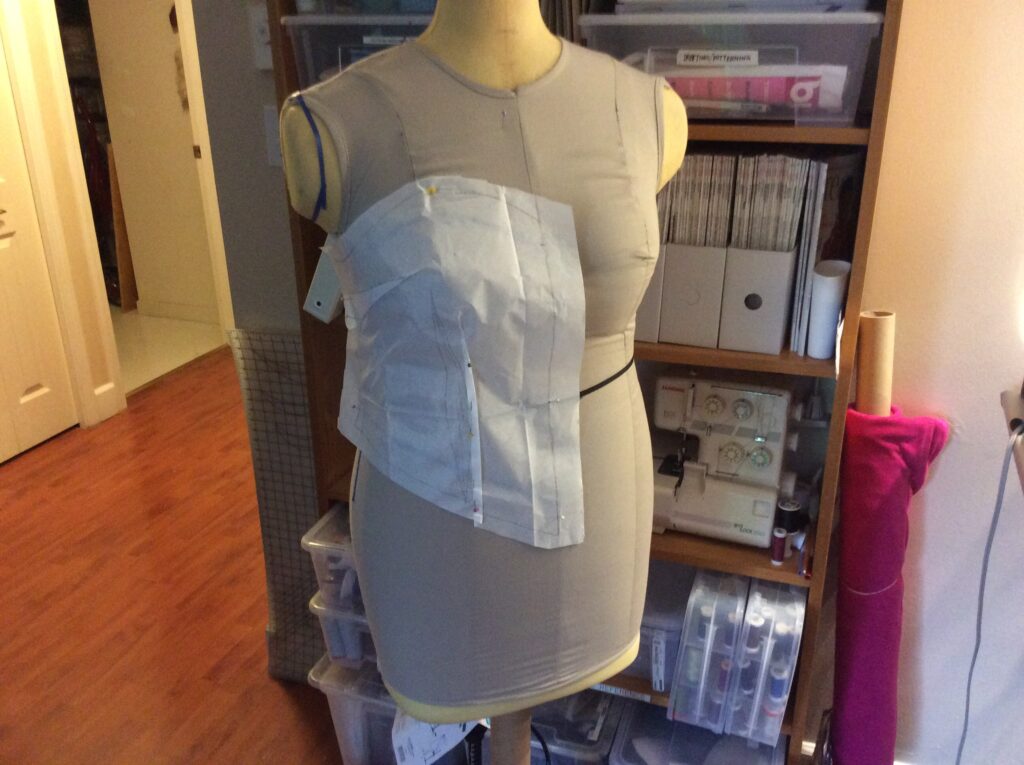
The patterning is complete; the pieces are cut (including one extra back skirt panel). I’m glad I bought 4m of this satin because cutting things on the bias gobbles up fabric like nothing I’ve seen.
I am going to let all the pieces hang overnight pinned together before I sew anything. I also realized at 9:10pm (ten minutes after the fabric store closed) that I have no black woven lining in my stash, only black knit lining. I want something that will stabilize the midriff piece a little bit, without adding ugly bulk.
The lace is going to be kind of tricky to sew together, and those shoulder seams have to support the weight of the dress because I can’t make this style fit too close to the body. (I fear it will end up a bit too fitted for the era, because my dress form has not been eating as many Empire doughnuts as I have la la la la la. I may have to invest in some new constricto-garments (aka Spanx) but that’s fairly authentic anyways.) I am going to look up a few suggestions for stabilizing seams in lace. I hope it doesn’t involve clear swimsuit elastic because I am not on good terms with that shit.
I am turning in for the night because being sleepy produces sewing fuckups, and I don’t want to have to unpick seams in either bridal satin OR lace.
10pm Friday Night – Success!
Well, it all came together. I had intended to update throughout the day today with my progress, but frankly I didn’t have a moment to spare. If I’d sat down to blog, I would not have departed my home at 6:25pm fully dressed with the complete look. So, here is a recap:
My first challenge was to determine a sewing order – which seams first and then following. When sewing from a pattern this is all laid out in the instructions, but I had no such luxury.
I started with the darts in the bodice midriff, and then attached the front and back lace panels to the front and back midriff. This involved basting the lace to the fashion fabric and sandwiching it with the lining, with straight stitch across all the layers. No problem! Then, I did shoulder seams in the lace with a zigzag stitch and reinforced them with a four-thread serger seam finish. This seemed to stabilize the seams all right without adding twill tape or anything else – which is good because I didn’t have any stabilizing tape narrow enough to do the job.
Then it was time to do the side seams, and I ran into a spot of trouble here as I realized that in order to attach the lining in the way I wanted, I had to keep the lining separate from the fashion fabric. Soooo I did my first bit of seam-ripping, taking apart the edges of front and back bodices. I should have sewn the side seams of the lace panel together first, then sewn the fashion fabric midriff side seams (and lining side seams) and sandwiched the whole lace part to the whole bodice part, all the way around the body. This delay caused me a bit of alarm, as it was getting along to about 1:30pm by the time I was at this stage. No time for lunch, just a few bits of this n that.
The next step was to assemble the skirt. I opted not to line the skirt, though I would like to perhaps go back and add a lining if I can figure out how. So it was just a matter of doing the side seams… into which I decided I needed to add some godets. Of course, right?

I had cut the godets as squares on the straight grain. They went into the side seams with remarkably little fuss or muss for which I think there must be some kind of costuming deity looking out for me.
I played it dangerous with attaching the skirt to the bodice… I pinned and didn’t baste the seam!! I did sew it in segments though, because the angles of the design made for some rather tricky corners. This is where basting might have made it go just a little smoother, but it was 3pm by this time. Fortunately even though there are some puckers at the corner, it just somehow looks a bit like they’re intentional. If you don’t look too closely, that is.
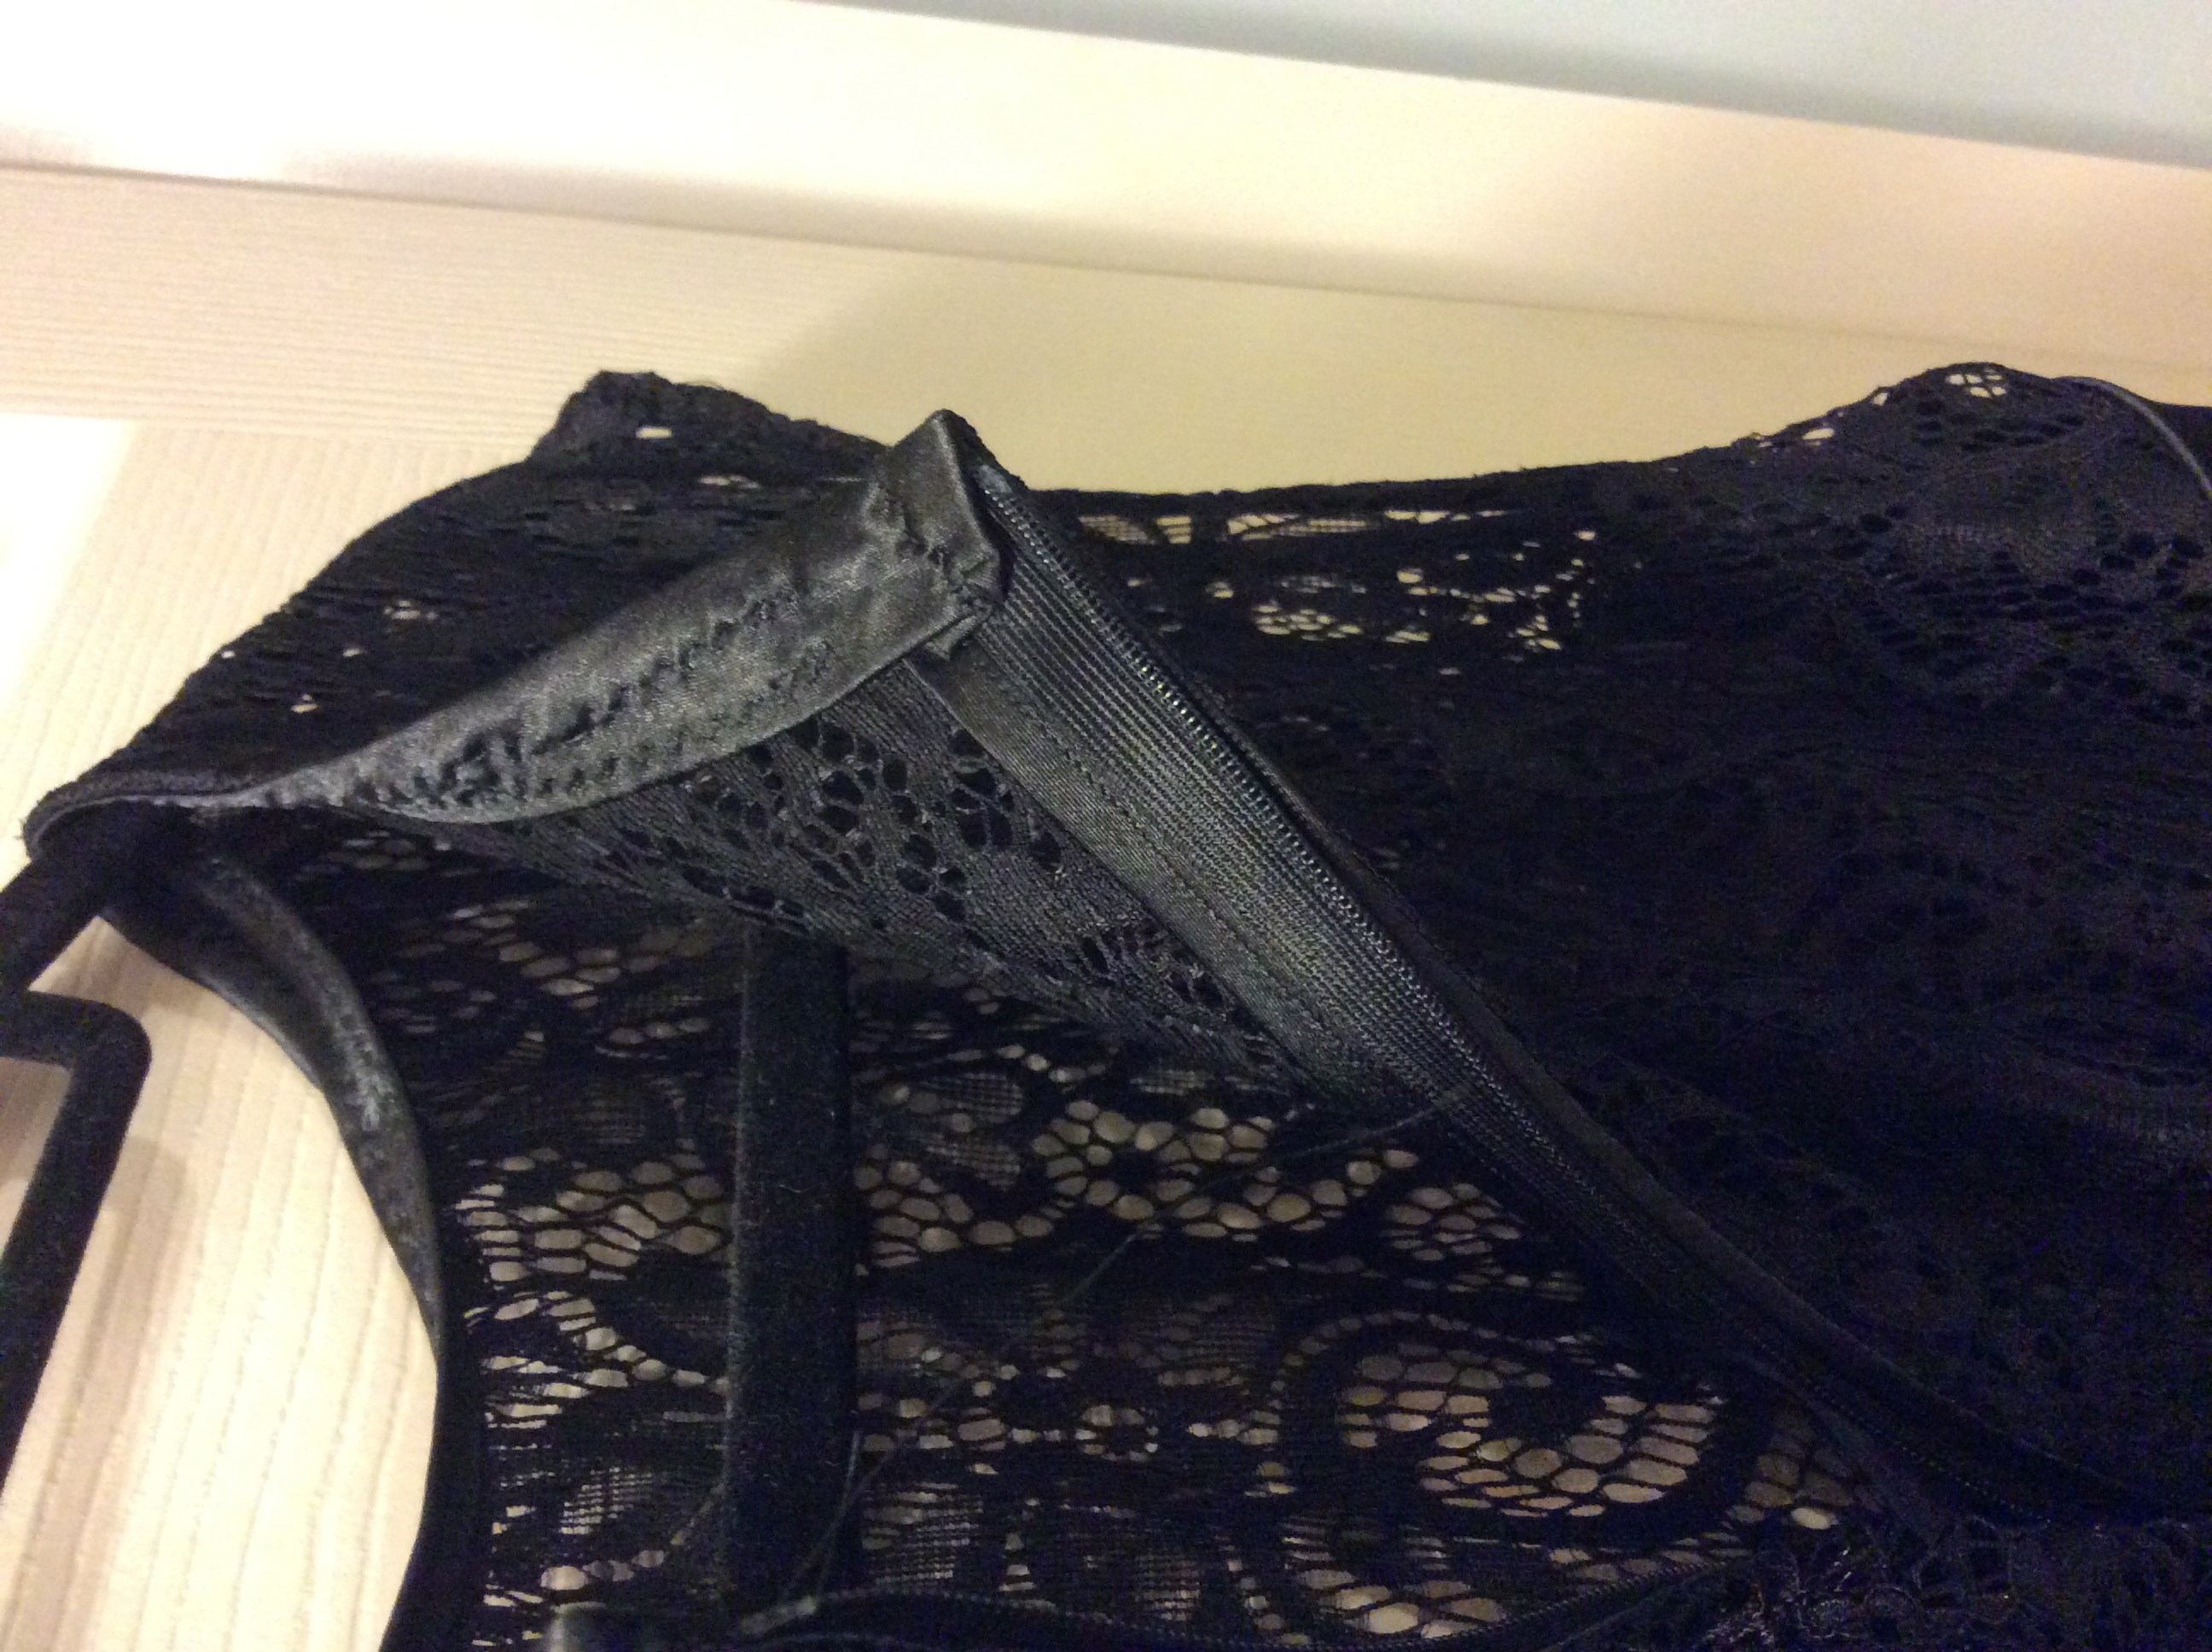
When it came to the zipper, I was rather flummoxed. Inserting an invisible zipper is not the easiest – inserting one into a garment that combines bias cut, straight cut with a lining, AND stretch lace… holy moly. I did some googling and found some advice to use a bias strip to reinforce the edge of the lace. That worked, after one rather nerve-wracking 20 minutes of unpicking a seam that I shouldn’t have sewn, involving two layers of satin and one layer of stretch lace. After fixing that minor problem, and re-doing the bodice/skirt seam at the zipper opening edges so that it would all work with the new reinforcements… I bravely set about to insert the zipper.
Two of my favourite products for inserting invisible zippers are fusible interfacing tape (“Seams Soft” I think it’s called – obviously not getting any affiliate $ here) and Steam-A-Seam narrow double-sided fusible tape. The Seams-Soft reinforces the opening edge so it doesn’t stretch when you attach the zipper. The Steam-A-Seam holds the zipper in place instead of pinning or basting. Between these two products and some luck, I managed to get the zipper inserted almost perfectly the first time. My bodice/skirt seams don’t line up perfectly, but this is a costume and not a sewing contest. So I’ll survive. I finished the rest of the back centre skirt seam. (I used a narrow zigzag stitch on all the bias skirt seams, btw – it helps them hang naturally).
The last part was to finish the neck and arm hole edges, and the skirt hem. It was 4:30pm and I had a hard deadline of 6:15 to finish.
Having seen the ease of putting a satin bias strip around the lace for the zipper, I decided to do the same with the neckline. I reinforced the bias strip with Seams-Soft to give it some holding power. This also made it marginally easier to press a fold into the satin bias strip. (Owww my blistered fingers!) It looks a little Becky-home-ecky but it gets the job done:
I used regular double-fold bias tape on the armholes, which was much easier since cotton presses ten times more easily than satin!!!
It was 5:30 by the time I was ready to do the hem. Normally I would use a nifty baby-hem trick I have (which I will share another time) but I was out of time. So, I ran Steam-a-Seam tape along the bottom of the skirt, folded it up once and pressed it in place. Yayyy for adhesives. I did a simple straight stitch to reinforce the hem.
It was 6:05 when the completed dress came off my work table.
I was delighted with the finished look. I wore some fabulous fishnet stockings with embellishments at the back ankle, and a pair of black high heels that I like to call my “court shoes”. My hair got hair sprayed into submission, and I applied the slightest bit of lipstick. Accessorized with rhinestone strings tied below the bust… it all came together looking much more authentic than I’d imagined possible.
Will I do another period costume/outfit again? Not with satin, I’d say. I have always maintained that one does not look better when one’s dress is shiny. But I am not afraid of using lace again. And I really like this “illusion” neckline. Plus who doesn’t love a godet?
Thanks for reading along!!